Saturday, December 22, 2012

Sweet Ornament

Here is a cute little ornament that I made from a free SVG Cuts file.
You can get 2 bases from a 12x12 sheet of cardstock
 so I made them for small gift bag stuffers.
 
 
Starting with a mint green cone, I added coordinating papers and
alternated them on the sides and tops.
The glittery poinsettia is inked, popped, set on a background
of branches from my favorite MS punch, and finished off
with a sparkling gem for the center.
 
 
I filled this with mini peanut butter cups for a treat to anyone who passes by
and needs to feed their sweet tooth!
I am entering this in the following challenges:
 
TFL!
 
Merry Christmas to all!


HO! HO! HO!

Here comes Santa Claus!
This is another image from the SVG Cuts kit: Santa's Visit
I made this card specifically to send to my grandbaby, Maddix.
This will be his 2nd Christmas, so it's time he started getting mail!  HO! HO! HO!
This is so easy to make and you will love it when it's done.

 
I started with a parchment paper look for the card base,
added the festive embosed lime green mat along with
the red and black glitter mats.
I added some left-over holly leaves, snowflakes, and my
favorite MS branch punch to dress up the corners.
 
Santa is done in red and white glitter papers, embossed, and his
nose, mustache, eyebrows, and hat pompom are popped for dimension.
His eyes are a partial Peachy Keen stamp that I outlined in black ink
and added the cute little eyelashes.
Santa would go great on an action wobble, so if you are hand delivering
or don't mind paying the extra postage, that is the way I would go.
He is soooooooo cute!
Another stamp mat and sentiment finishes off the inside.
I have to get this in the mail........TFL!
 
I will be entering this in the following challenges:
FOSTV - Christmas
Simple Salutations - Santa
Pause Dream Enjoy - Anything goes

Friday, December 21, 2012

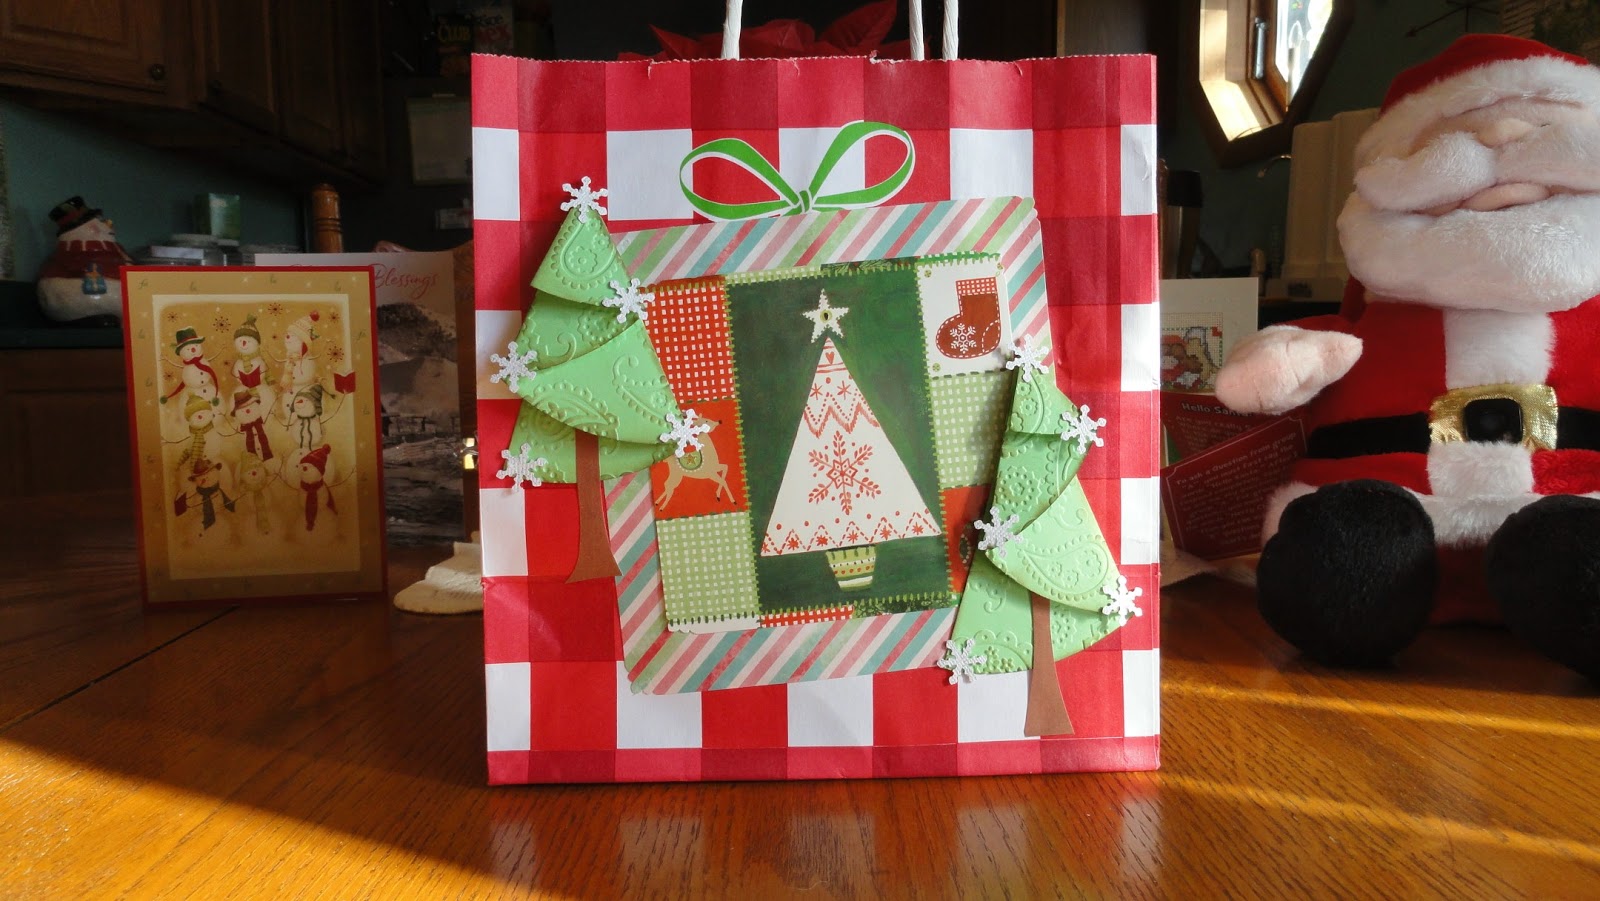
Gift Bag Upload

I wanted to share with you another one of my
"uploaded" gift bags from Bath and Body.
 
 
I started with a Christmas card front that we had
received last year, rounded the corners and added
punched snowflakes from white glitter paper.
The folded Christmas tree ( I love this fold! ) is popped,
adorned with the same showflakes, and embossed to finish the front.
 
 
The reverse side is done is much the same way.
 
 
I also run a piece of white cardstock through my Xyron
to cover up the lettering on the sides.
 
 
I will fill this holiday bag with B&B products, tie the top with a ribbon,
and add a hand made gift tag.
I will enter this into the following challenges:
 
TFL!
Merry Christmas to all!


Tuesday, December 18, 2012

Ho Ho Ho Bingo!

I totally scraplifted this idea from Mary at Cardz TV
and her 12 days of Christmas projects.
I loved this idea and have been wanting to make a "BINGO" card for quite some time.
I didn't have the stamp, but found a free printable online,
so my version of her card was born.
 
 The BINGO card is matted on 3 different papers -
white, glitter green, and striped cardstock that has been run through a crimper.
The BINGO card has been inked, stamped, colored, and had the corners rounded.
 
 
The candy is from the Celebrations cartridge and is cut from
glitter papers at 2 1/2" using Real Dial Size.
I used my favorite MS branch punch for the corner embellishment,
and used the different candy cuts for markers.
Santa is from the Doodlecharms cartridge and is cut at 2 1/2" regular.
I thought he would make a cute addition to this
Ho Ho Ho BINGO! card.
 
I will be entering this in the following challenges:

Skate your troubles away...

This card is so pretty that I don't think my pictures really do it justice.
All images are from the WW cartridge.
I started with a mint green centerstep card base and
matted it with soft hues of blue and pink.
I topped it with embossed white borders that are actually trees, but look like
icicles when they are turned upside down.
The main mat is a scalloped oval done 3x in 1/4" increments,
and ending with a white glitter paper.

 
The origami Christmas tree is done in two different coordinating papers
and topped with a snowflaked pink star.
The elegant skater is also cut in glitter paper so she sparkles on the ice!
Punched silver hologram snowflakes round out the card front.
This is so much prettier than I imagined it....I love it!
 TFL!
 
I will be entering this in the following challenges:

Monday, December 17, 2012

The Christmas Wreath

This is our Christmas card for 2012.
Anyone who follows me should know by now
 that I love the easel card fold.
It's so easy to make and I just enjoy the way it stands up for display.
 
All of the cuts are from the Christmas solutions cartridge.
 
 
I started with a glittery pink 5.5" embossed circle,
cut the shadow and the wreath in both white and green glitter paper.
The layers are also cut in festive glittery glows.
The bow is popped and is added to the bottom
(instead of the top as shown in the handbook), I added glossy accents
to the bow and to the red berries, and finished the front
by dressing up the holly leaves with my fave MS branch punch.
 
 
I chose a festive lime green cardstock for the card base,
added a scalloped cirle mat and popped the bottom image to hols
the card front when folded.
The inside Christmas Wreath poen and personal sentiment
add the finishing touches to this beautiful card.
 
 
Here is the finished product as it stands on my foyer table


I will be entering this in the following challenges:
Merry Christmas to all and to all a good night!
TFL!
 

Friday, December 14, 2012

Silver Bells

I wanted to try to make a non-traditional card for the holidays.
I have a spot on my table that needs a special touch,
but I wanted something different, so here is my design.


I started with a pink centerstep card and
added the pink and purple gingham papers.
For sparkle, I cut the bell at 4" from the TTT cartridge
with the blackout layer done in a silver metallic topped
with a dark purple outline.
Scalloped circles from WW have been embossed and inked to
form the backdrop for the beautiful "Silver Bell."
 
The snowy border that decorates the bottom is actually a
Fiskars Christmas Tree punch that has been turned upside down.
The sentiment was actually printed on my Cricut using the WW font
and is backed by handcut mats that have had the corners rounded.
 
Again, using my favorite punches of the season,
I added the snowflakes and branches for that festive touch.
 
 
The inside cooridinates with the card front and the sentiment
is stamped in purple ink from the All Night Media - Say it with Stamps kit.
 
I don't make very many of these non-traditional cards,
but always enjoy the look when they're complete.
TFL!
 
I will be entering this in the following challenges:
Merry Christmas to all!